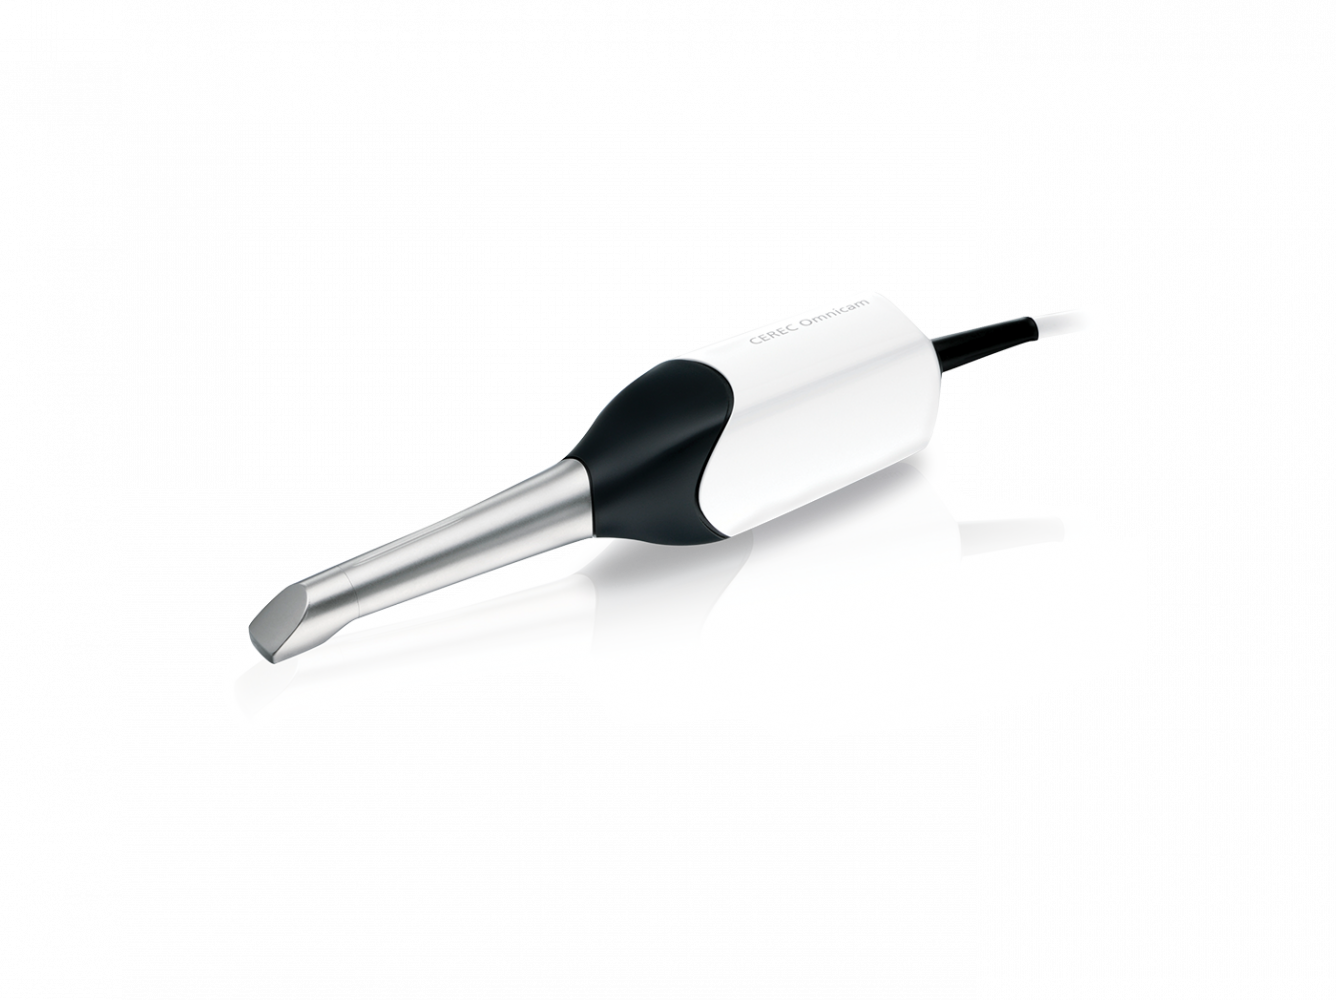
CEREC Omnicam Intraoral Scanner
Unrivalled handling, powder-free scanning and precise 3D images in natural colour!
Read more Enquire nowUnrivalled handling, powder-free scanning and precise 3D images in natural colour!
Read more Enquire nowView Our intraoral scanning guide
Are you ready for the digital dentistry revolution with digital scanning? Digital scanning in Dentistry is made easy – Only with Sirona CEREC omnicam for practices! Acquire an image of the preparation and opposing jaw with the CEREC design process. Use CEREC Cad Cam to scan, design and mill a crown in just a few hours!
Just a few clicks are needed to draw the preparation margin, and the software assists you with marking and supports you with a pivoting 3D view.
Unrivalled handling, powder-free scanning and precise 3D images in natural colour! The Omnicam is innovative, versatile, and a sensation in the CADCAM camera market.
The Omnicam is designed to hold naturally, so taking digital impressions is easy, intuitive and ergonomic.
CEREC Omnicam – Innovative & versatile in the CAD CAM camera market.
Benefits at a glance:
CEREC workflow and drawing the margin
CEREC 4.3 Software Overview
Tutorial CEREC Omnicam Scanning Technique
How to calibrate your Omnicam
CEREC Omnicam Demo
 Action
To start, check the following:
If you receive the message "Unknown USB device" after connecting the camera, reboot the computer
Action
The Omnicam camera cable has two parts. The first camera cable is attached to the Omnicam and with it forms a unit.
To re-establish the connection between the Omnicam and the cable, carry out the steps listed above in reverse order. Ensure that the stainless steel sleeve and the anti-kink sleeve fit together well and that the same applies for the camera injection mould.
Action
When calibrating the Omnicam, follow the instructions in the Omnicam User Manual. Ensure that the protective cover is replaced after using the calibration set so as to prevent the camera from being contaminated. If a calibration is repeatedly unsuccessful, replace the calibration set.
No, coating free scanning saves an additional working step, reduces the learning curve and increases patient comfort.
Yes, through CEREC connect.
The software updates are free of charge and are available from http://www.sirona.com/en/products/digital-dentistry/restorations-with-cerec/?tab=3720. Major software updates are free to CEREC club members and will be posted out (CD format) with the licence code.
Width 350 x Height 1210 x Depth 470 (mm)
The unit is portable from one surgery to another (on one level) as it has a four castor wheels base.
Danger of touching live parts: If the housing is damaged, there is a possibility of touching live parts inside the unit. If the housing is damaged, the unit must be put and left out of operation until it has been professionally repaired.
Regular Inspection
Some countries have legal regulations which require regular safety inspections of electrical devices or systems by the operator.
A so-called "retest" (repeat test) must be carried out for the CEREC AC acquisition unit every three years at the latest. In addition, this retest also must be performed following every repair or retrofit of components such as the PC, the PC power supply, the camera and the camera cable.
Annual maintenance performed by trained technical personnel is recommended.
Use only care and cleaning agents which have been approved by Sirona
Do not use the agents listed below on the LCD monitor. You can use these agents for all other surfaces, including the camera.
Cleaning
The monitor screen can be wiped off with a soft cloth.
Never spray the monitor screen with a disinfectant or cleaning agent.
Use only care and cleaning agents which have been approved by Sirona
Cleaning
Due to their high concentrations and the substances they contain, many medicaments can dissolve, etch, bleach or discolour surfaces.
The only way to prevent damage is to wipe off medicaments immediately with a damp cloth and a cleaning agent

1. Rotate the cover ring counterclockwise and remove it.
2. Clean inner surface of cover ring (A) with ethanol (commercially available cleaning alcohol).
3. Remove the ball.
4. Wipe out the calotte (spherical cap).
5. Insert the ball.
6. Fit the cover ring and turn it clockwise until it is firmly tightened.
Setting the ease of action of the ball: For cover rings with various detent positions, the ease of action of the ball can be set by selecting the corresponding detent position.
The measurement procedure used by the system requires the use of a calibrated CEREC Omnicam. The CEREC Omnicam is factory calibrated, then calibrate the CEREC Omnicam after every reinstallation and after every transport. The calibration set supplied with the CEREC Omnicam is available for the calibration process. The supplied calibration set and a USB stick form a single unit.
Recalibrate the CEREC Omnicam in the following cases:
Prior to the first calibration
Ensure to take note of the serial number of the calibration set when starting the calibration, which must be used at this point. The number displayed in the software and the serial number on the calibration set must be identical.
The serial number of the calibration set to be used has been set on the CEREC AC with Omnicam at the factory. Prior to the first calibration after changing the PC and when switching the calibration set, you must enter the serial number of the calibration set to be used in the software. If you do not wish to do this, you can continue with "Start calibration [54]"
When entering the serial number, the following steps should be followed:
- With all future calibration work involving the "CEREC SW" software, you will be prompted to use this calibration set.
Start calibration
Calibrate the camera

Measuring the position of the exit window
Error message during calibration
The software indicates if an error occurs during calibration. If the calibration process resulted in errors, restart the process.
End calibration
✔ The software indicates that the calibration was completed successfully.
Components of the Omnicam
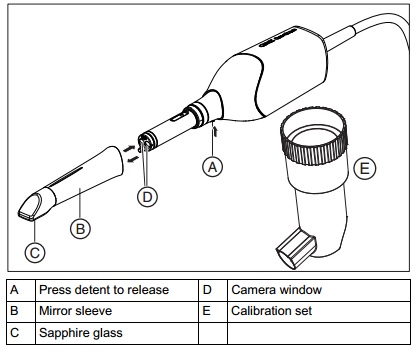
The CEREC Omnicam is a very sensitive optical device and must therefore be handled with the utmost care. Protect the sapphire glass and the camera window against scratching and clean them with a lint-free cloth and ethanol (commercially available cleaning alcohol).
Removing the mirror sleeve
Risk of damaging the camera window or sapphire glass. Push the mirror sleeve straight toward the front; do not tilt it.
Do not spray the CEREC Omnicam or immerse it in cleaning agents or disinfectants
If the CEREC Omnicam accidentally falls, check to make sure that the camera window and sapphire glass are not damaged. If the CEREC Omnicam has been damaged, it must no longer be used on patients. The CEREC Omnicam must be recalibrated.
Not sterilisable: Do not under any circumstances sterilise the CEREC Omnicam or the video cable
The mirror sleeve can be sterilised with hot air (180°C, 30 min), not in the autoclave.
Risk of damaging the camera window or sapphire glass.
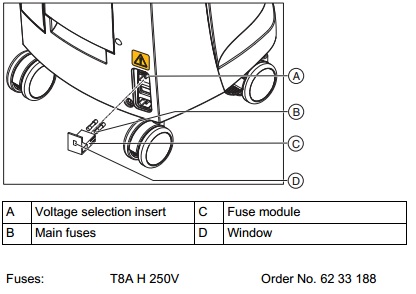
Electric shock - Disconnect the power plug at the unit end before replacing the fuses.
Fuse type - Use only fuses of the same type in the fuse module.
The power plug must be disconnected.
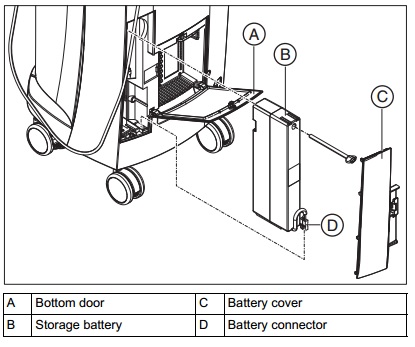
Reduced buffer cycles
After around 1000 buffer cycles the capacity of the battery fades due to the nature of the battery technology used.
If the buffer times are too short, you should replace the battery.
The storage battery is permanently charged during operation on line voltage. This allows brief buffer operation after 1 hour of charging.
For a complete charge, the battery must be charged without interruption for at least 12 hours. Keeping the acquisition unit connected to the mains voltage and the power switch on is sufficient here. The PC does not have to be switched on for the charging process.
We know an unexpected breakdown in your practice can be a massive headache for you and your patients - which is why we have a dedicated team of 50 people ready to provide you with a range of comprehensive cover options for your practice equipment, giving you complete peace of mind and minimising the cost of an unexpected breakdown. You can depend on us.
With Protection Cover, you get free access to our team of 10 high tech digital support specialists who can help with digital imaging, lasers and CAD/CAM. For the simpler problems, we also have technicians, who are dedicated to helping you over the phone. You can also at a small cost, use their services even if you don't have cover.
Invest in your practice - choose our comprehensive protection cover. For 12 months we will cover the items you want. It includes an annual service, emergency breakdown, labour and access to our high tech digital support specialists.
To get optimum performance from your equipment and to conform to manufacturer’s recommendations, an annual service could be just what you’re looking for. It’s carried out by our accredited team and includes a 3 month warranty on the work.
We are never far away in an emergency. Unplanned breakdowns are a headache for any surgery. We are more than happy to help.
Our equipment team will use the information you provide to respond to your query as promptly as possible.
You could ask about a FREE one-to-one consultation with one of our specialist team, quotation, demonstration of the latest equipment, or any other question you may have in helping you make an informed decision.