View Our digital imaging guide
Compact and easy
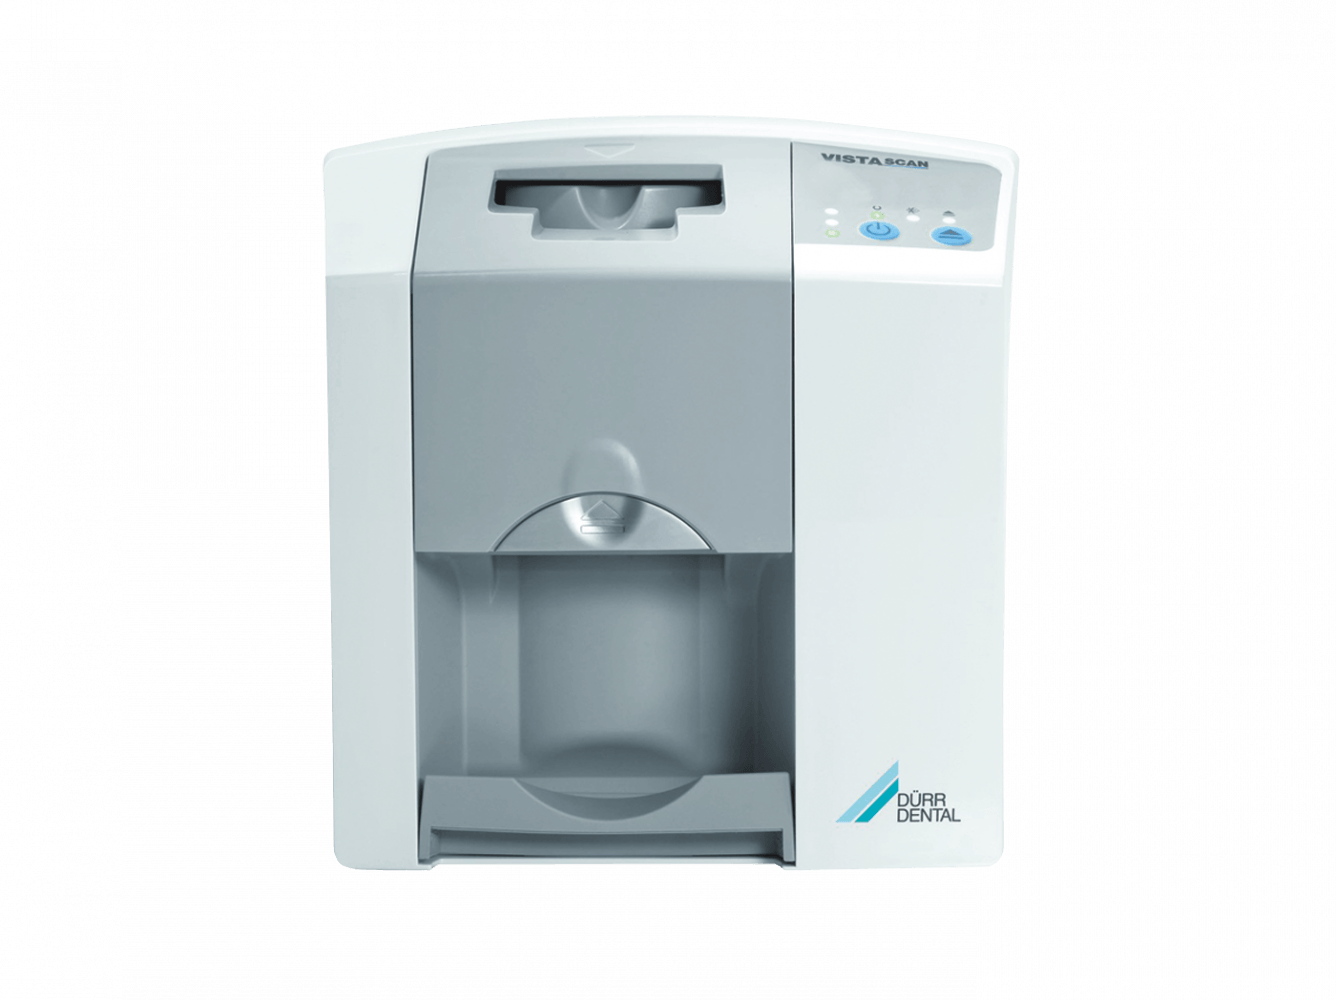
The VistaScan Mini Easy image plate scanner makes image plate diagnostics even faster for dentists. The compact device is particularly easy to use and requires a minimum of space – so that it can be installed in the treatment room. The advantage: X-ray and scanning directly at the chairside. The reusable VistaScan image plates are read out in top quality within seconds. There has never been a better time to change over to image plates.
Key features:
High resolution images
With low noise, supports a reliable diagnosis

Common sizes
Image plates size 0 and size 2 can be used with VistaScan Mini Easy. In addition, 100 % active surface area is available. Simple handling – just like with an analogue film.

Easy handling
Particularly easy handling: Read out, erase and make ready for the next use in one step. Rapid image availability from 6 seconds in the direct vicinity of the patient.

Easy integration
VistaScan Mini Easy can be operated with the Dürr Dental Imaging Software or other software packages via plugins or Twain drivers. It can be easily integrated into the surgery infrastructure via USB or network.

Before working on the appliance unplug at the mains and remove all power.
Messages below include defective radiograph, software errors and errors on the appliance.
Possible Cause
Image plate has been fed the wrong way round and the inactive side has been read out.
Action
Immediately read the image plate again, inserting the image plate correctly.
Possible Cause
Image data on the image plate was erased, e.g. by ambient light.
Action
Always read the image data of the image plate as quickly as possible.
Possible Cause
Fault in the appliance.
 Action
Call our service team on 0800 028 4749.
Possible Cause
No image data on image plate, image plate not exposed.
Action
Expose image plate.
Possible Cause
X-ray appliance is faulty.
Action
Call our service team on 0800 028 4749.
Possible Cause
Wrong cover, the light protection cover has also been drawn in.
Action
Use a cover matching the size of the image plate.
Possible Cause
X-ray dose too high.
Action
Check X-ray parameters.
Possible Cause
Incorrect brightness/contrast setting in the software.
Action
Set the brightness of the radiograph in the software.
Possible Cause
Exposed image plate subject to effects of ambient light.
Action
Always read the image data of the image plate as quickly as possible.
Possible Cause
X-ray dose is too low.
Action
Check X-ray parameters.
Possible Cause
Incorrect brightness/contrast setting in the software.
Action
Set the brightness of the radiograph in the software.
Possible Cause
X-ray dose on the image plate too low.
Action
Increase X-ray dose.
Possible Cause
Amplification level (HV value) set too low in the software.
Action
Increase amplification (HV value).
Possible Cause
Unsuitable scanning mode selected.
Action
Select a suitable scanning mode.
Possible Cause
Threshold setting too high.
Action
Reduce threshold setting.
Possible Cause
Image plate off-centre and fed at an angle.
Action
Centre image plate and feed straight.
Possible Cause
Image plate exposed on the wrong side.
Action
Place image plate correctly in light protection cover.
Position image plate correctly.
Possible Cause
Plus ID image plate (with marker) exposed on the wrong side.
Action
When taking an X-ray make sure the active side points towards the X-ray tube.
Possible Cause
Image plate double exposed.
Action
Only expose image plate once.
Possible Cause
Image plate not sufficiently erased.
Action
Check the erasure unit is working correctly.
Call our service team on 0800 028 4749 if reoccurs.
Possible Cause
Image plate bent during X-ray exposure.
Action
Do not bend the image plate.
Possible Cause
Image plate removed from the light protection cover before reading.
Action
Do not handle an image plate without a light protection cover.
Store the image plate in a light protection cover.
Possible Cause
Metal part of the X-ray tube is in front of the X-ray beam.
Action
When taking an X-ray, make sure there are no metal parts between the X-ray tube and patient.
Check the X-ray tube.
Possible Cause
Edge masking defective in the imaging software.
Action
Deactivate edge masking.
Possible Cause
X-ray dose on the image plate too low.
Action
Increase X-ray dose.
Possible Cause
Amplification level (HV value) set too low in the software.
Action
Increase amplification (HV value).
Possible Cause
Unsuitable scanning mode selected.
Action
Select a suitable scanning mode.
Possible Cause
Threshold setting too high.
Action
Reduce threshold setting.
Possible Cause
Image plate pre-exposed, e.g. by natural radiation or scattered X-ray radiation.
Action
If the image plate has been stored for longer than one week, erase the image plate again prior to use.
Possible Cause
Parts of the image plate were exposed to light during handling.
Action
Do not expose used image plates to bright light.
Read image data within 30 minutes of the exposure.
Possible Cause
Image plate was soiled or scratched.
Action
Clean image plate.
Replace scratched image plate.
Possible Cause
Too much stray light entered during scanning.
Action
Darken the room.
Turn the appliance so that the light does not fall directly onto the input unit.
Possible Cause
Slipping transport.
Action
Clean transport mechanism, replace transport belts if necessary.
Possible Cause
Wrong light protection cover or image plate used.
Action
Only use original accessories.
Possible Cause
Dirt in the laser slit (e.g. hair, dust).
Action
Clean laser slit.
Possible Cause
Micro scratches on the image plate.
Action
Replace image plate.
Possible Cause
Wrong holding system used.
Action
Only use original image plates and film holding system.
Possible Cause
Image plate handled incorrectly.
Action
Use the image plate correctly.
Heed the operating instructions of the image plate and film holding system.
Possible Cause
Appliance is exposed to too much light.
Action
Darken the room.
Turn the appliance so that the light does not reach the entry slot directly.
Possible Cause
Incorrect power unit has been connected.
Action
Use the power unit provided.
Possible Cause
Laser or erasure unit too hot.
Action
Switch off the appliance and allow to cool.
Possible Cause
LED soiled or defective.
Action
Call our service team on 0800 028 4749.
Possible Cause
Appliance not switched on.
Action
Switch the appliance on.
Possible Cause
Connecting cable between appliance and computer not connected correctly.
Action
Check the connecting cable.
Possible Cause
Computer does not detect connection to the appliance.
Action
Check the connecting cable.
USB driver not installed or inactive.
Check network setting (IP address and subnet mask).
Possible Cause
Hardware fault.
Action
Call our service team on 0800 028 4749.
Possible Cause
Appliance is set up behind a router.
Action
Configure IP address without intermediate router on the appliance.
Connect the router in between again.
Manually enter the IP address in VistaConfig and register the appliance.
Possible Cause
Subnet masks of the computer and the appliance do not agree.
Action
Check subnet masks, match if necessary.
Possible Cause
Appliance connection has been lost while software still wants to contact the appliance.
Action
Restore the appliance connection.
Repeat procedure.
Possible Cause
Wrong or too long connecting cable used.
Action
Only use original cable.
Possible Cause
No supply voltage.
Action
Check mains cable and plug connection, replace if necessary.
Check power unit.
If the green display does not light, replace the power unit.
Check the main fuse box in building.
Possible Cause
On/off switch defective.
Action
Call our service team on 0800 028 4749.
Possible Cause
Mains cable or one of the plugs has not been inserted correctly.
Action
Check the mains cable and all connections.
Possible Cause
Hardware defective.
Action
Call our service team on 0800 028 4749.
Possible Cause
Mains supply voltage too low.
Action
Check the supply voltage.
Possible Cause
Display defective.
Action
Call our service team on 0800 028 4749.
Possible Cause
Radiation deflector defective.
Action
Call our service team on 0800 028 4749.
Possible Cause
Appliance has not yet completed boot procedure.
Action
Wait 20 - 30 seconds after switching on until the boot procedure has completed.
Possible Cause
Appliance is blocked by the firewall.
Action
Enable the ports for the appliance in the firewall.
Possible Cause
Wrong cover used.
Action
Use a cover matching the size of the image plate.
Possible Cause
Incorrect (too big) cover used.
Action
Use a cover matching the size of the image plate.
Possible Cause
Cover or light protector is missing or not correctly in position.
Action
Attach cover and light protector correctly.
Possible Cause
No connection between appliance and computer.
Action
Check cable and cable connection.
Activate appliance via software.
Activate or install USB driver.
Possible Cause
Data memory in the appliance is full.
Action
Use software to set up state of readiness. The image data is automatically transferred from the appliance to the software.
Recommended maintenance schedule
 Please be aware: Only specialist or personnel trained by Durr Dental may maintain the appliance.
Annual
Every 3 years
Cleaning and Disinfecting
NOTICE - Unsuitable agents and methods can damage the appliance and accessories
Image plate scanner
Unit surfaces
The unit surface must be cleaned and disinfected of contamination or soiling. Use the following cleaning and disinfectant agents:
NOTICE - Liquid can cause damage to the appliance
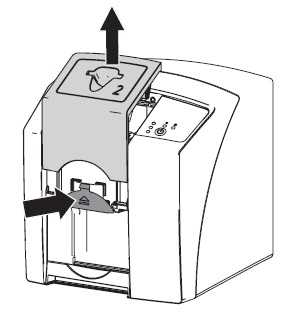
Input unit
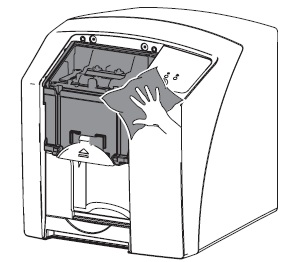
The input unit must be cleaned and disinfected if there is any sign of contamination or visible dirt.
For wiping disinfection, use the following cleaning and disinfectant agents:
For immersion disinfection, use the following cleaning and disinfectant agents:
NOTICE - Heat damages plastic parts
 |
 |
|
|
Light protection cover
The surface must be cleaned and disinfected of contamination or soiling. Use the following cleaning and disinfectant agents:
Image plate
Use the following cleaning agents:
NOTICE - Heat or humidity damages the image plate
Protective cover
Use the following cleaning agents:
Storage box with image plate storage tray
If the surface of the storage box and the inside image plate storage tray shows signs of contamination or visible soiling, clean and disinfect.
Use the following cleaning agents for the storage box:
Use the following cleaning agent for the image plate storage tray:
Disinfect the image plate storage tray with a disinfection wipe. Alternatively, the image plate storage tray can be treated in the thermal disinfector or steam steriliser.
We know an unexpected breakdown in your practice can be a massive headache for you and your patients - which is why we have a dedicated team of 50 people ready to provide you with a range of comprehensive cover options for your practice equipment, giving you complete peace of mind and minimising the cost of an unexpected breakdown. You can depend on us.
With Protection Cover, you get free access to our team of 10 high tech digital support specialists who can help with digital imaging, lasers and CAD/CAM. For the simpler problems, we also have technicians, who are dedicated to helping you over the phone. You can also at a small cost, use their services even if you don't have cover.
Invest in your practice - choose our comprehensive protection cover. For 12 months we will cover the items you want. It includes an annual service, emergency breakdown, labour and access to our high tech digital support specialists.
To get optimum performance from your equipment and to conform to manufacturer’s recommendations, an annual service could be just what you’re looking for. It’s carried out by our accredited team and includes a 3 month warranty on the work.
We are never far away in an emergency. Unplanned breakdowns are a headache for any surgery. We are more than happy to help.
Our equipment team will use the information you provide to respond to your query as promptly as possible.
You could ask about a FREE one-to-one consultation with one of our specialist team, quotation, demonstration of the latest equipment, or any other question you may have in helping you make an informed decision.