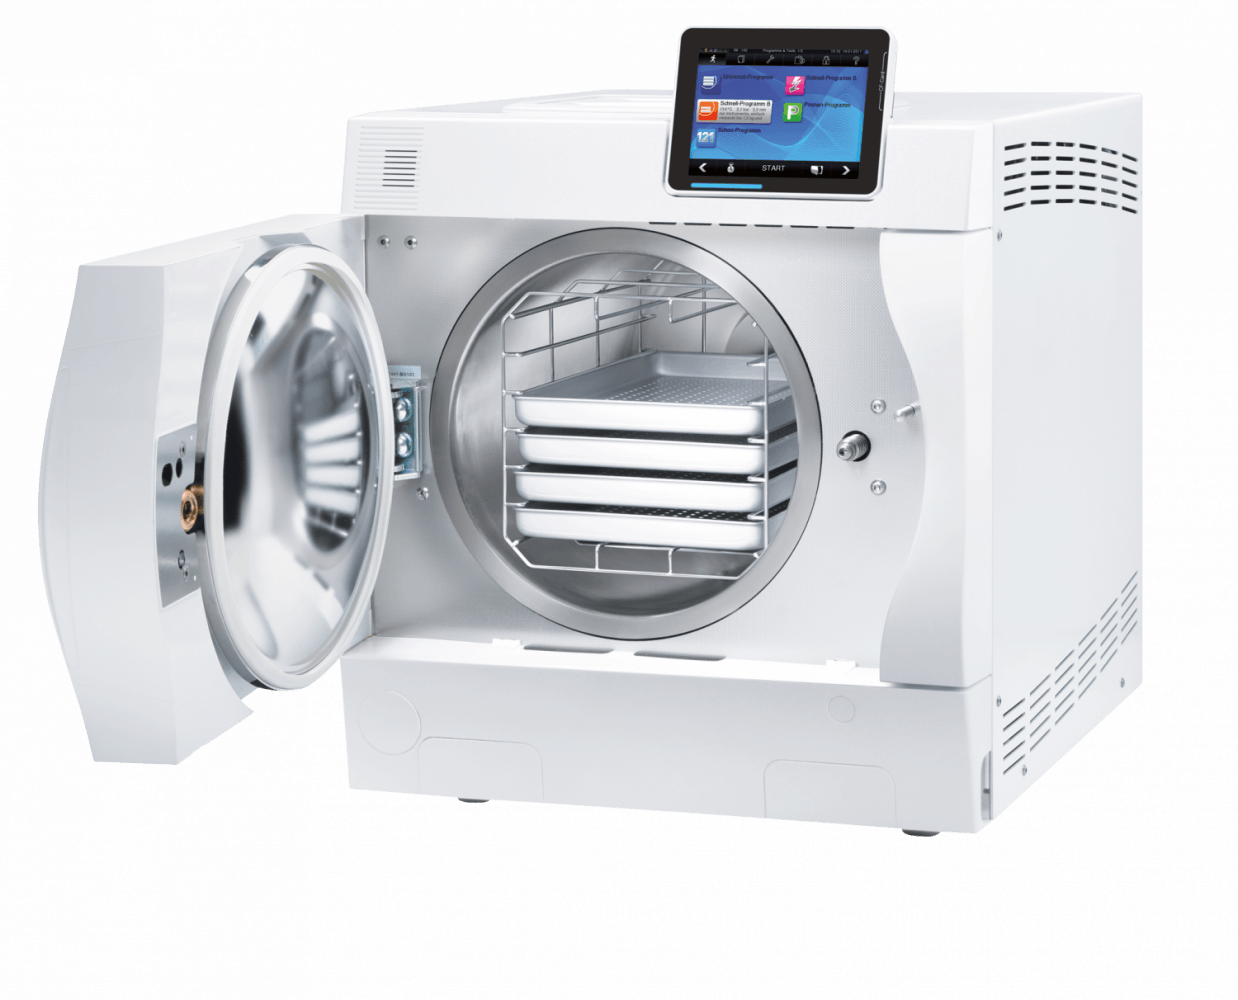
MELAG Evolution 41B+ Autoclave
Quick, easy-to-use and stand-alone â now with DRYtelligence
Read more Enquire nowQuick, easy-to-use and stand-alone â now with DRYtelligence
Read more Enquire nowThis high-performance practice steam steriliser brings the same record operating times as the almost identical Vacuklav 40 B+ Evolution. Its innovative double chamber technology means the sterilisation and drying of unwrapped instruments in only 10 minutes; wrapped instruments in a Class-B program require no more than 20 minutes. Both times include fractionated pre-vacuum and drying. The intelligent drying system DRYtelligence uses especially-developed algorithms to adapt the drying to the load in order to shorten the operating times even further and save resources. The Vacuklav 41 B+ Evolution is fitted with a patented air-cooling system, making it into a true stand-alone steam steriliser as it requires no connections other than to the electricity supply.
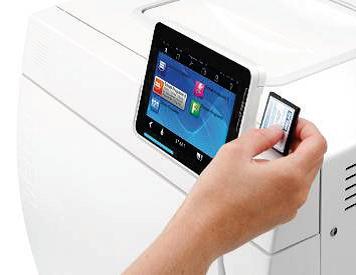
An especial advantage is the integrated software for approval, labelling and traceability of the sterilised instruments. This provides protection for doctor and patient alike. The extra-size of the colour-touch display makes work easier and avoids maloperation. Simply switch on the device, follow the intuitive instructions and enjoy your work.
How to perform a daily automatic control test (ACT)
Steam Steriliser Product Highlights: Vacuklav 41 B+ and 43 B+ Evolution | MELAG
Recommissioning your decon room post COVID-19
Detailed below is a list of event numbers which may appear on your autoclave's display. Click on an event number to see the possible cause of the error or warning and what action should be taken.
Please note the following:
A warning is not an error
Not all messages which appear on the display are error messages. Warning messages and error messages are shown on the display with an event number. This number serves for the identification.
Messages
Many messages are communications which are for your information. Messages are not error messages or warning messages. Such information supports you in the operation of the autoclave.
Warning messages
Warning messages are displayed when necessary. These contain operating procedures for you. Warning messages are not error messages. They help to ensure smooth operation and to recognise undesirable conditions. Observe these warning messages promptly in order to avoid errors.
Error message
Error messages are displayed if safe operation or sterilisation security is not guaranteed. These can appear on the display shortly after switching on the autoclave or while a programme is running. The programme is aborted if a malfunction occurs during a programme run.
If a programme is aborted before the drying cycle is complete, then the load is unsterile. Rewrap and repeat the sterilisation for the affected items.
If you do not find the problem below or the action you take does not solve the problem, please contact our service team on 0800 028 4749. In order to help you, have the serial number of your autoclave and a detailed fault description of the fault report ready.
Possible cause for internal storage tank for feed water
Water with inadequate water quality was poured into water storage tank (>60µS/cm).
Action
Empty and clean storage tank and fill with feed water of the quality DIN EN 13060.
Possible cause for water treatment unit
Mixed bed resin pellets in the water treatment unit are exhausted.
 Action
Renew mixed bed resin pellets for the water treatment unit.
Possible Cause
Water outlet not guaranteed; the measures for warning of a sink mechanism did not occur.
Action
Let water drain out, check siphon.
Possible cause for internal storage tank for feed water
No water in the storage tank.
Action
Fill internal storage tank.
Possible cause for water treatment unit
Produces no water because the water tap is not open.
Action
Open water inlet for the water treatment unit.
Possible Cause
The feed water quality is declining (>40µS/cm).
Mixed bed resin pellets - some exhausted.
Action
You can still carry out all work with the autoclave but should fill up the new feed water as soon as possible or renew the mixed bed resin pellets.
Possible Cause
Waste water tank was not or is not fully emptied.
Action
Empty waste water tank completely.
Possible Cause
Waste water hose is bent or installed with a large droop.
Action
Check waste water hose; it must be laid dip-free with continuous descent.
Possible Cause
Action
Do not switch off autoclave at the main switch while a programme is running. Check building-end installation; operate autoclave on a separate electric circuit.
Possible Cause
Maximum permissible difference between the theoretical temperature and that measured by temperature sensor 1 (AIN01) is too large.
Action
If the problem persists, call our service team on 0800 028 4749.
Possible Cause
Temperature sensor 1 or 2 is defective; temperature difference is too large.
Action
If the problem persists, call our service team on 0800 028 4749.
Possible Cause
Maximum admissible sterilisation temperature has been exceeded at temperature sensor 1 (AIN01).
Action
If the problem persists, call our service team on 0800 028 4749.
Possible Cause
Minimum admissible sterilisation temperature not reached at temperature sensor 1 (AIN01).
Action
If the problem persists, call our service team on 0800 028 4749.
Possible Cause
Action
Possible Cause
Cool air intake openings in the base plate are covered, for example, by sucked in papers.
Action
Remove objects (e.g. paper) from under the autoclave.
Possible Cause
Action
Possible Cause
Action
Possible Cause
ACOUT1 main heating or ACOUT2 regular heating, electrical supply interrupted; FOY1+ FOY2 can occur in alternation.
Action
Possible Cause
Observation of successive rinsing procedure. Rinsing condition in the feed water storage tank should be produced.
Action
Top up water storage tank with feed water or ensure water supply of the water treatment unit.
Possible Cause
Note subsequent draining requirements in the waste water tank must be prepared.
Action
Completely empty the waste water tank.
Possible Cause
In the following situations, no CF card is plugged in:
CF card is selected in the Settings - Logging as the output medium and immediate output is activated or log output is started from the Log output menu. CF card is set as the output medium or the CF card must be formatted.
Action
Possible Cause
Month directory on the CF card is full (more than about 100 logs).
Action
At the computer, transfer logs from month directories into newly created directories.
Possible Cause
Vacuum test at residual moisture in the chamber or with load.
Action
Repeat vacuum test if autoclave is cold, dry and empty.
Possible Cause
Two years have elapsed since the initial commissioning or since the last maintenance or 2000 sterilisation programmes have been completed.
Action
Call our service team to make a maintenance appointment on 0800 028 4749: autoclave can continue to be used.
Possible Cause
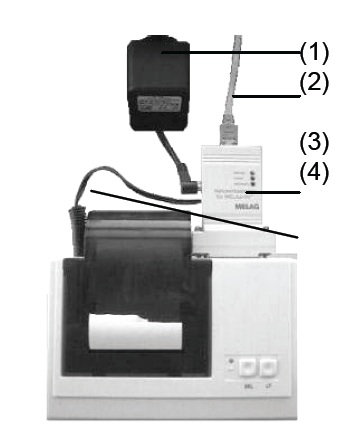
Attempt to output log over the log printer, but no log printer is connected.
Action
Connect the log printer as the output medium.
Possible Cause
Internal memory of the autoclave for the logs of the completed programmes is almost full.
Action
Read out the internal log memory on the storage medium of your choice with the Log Output menu (see page 32, Subsequent output of stored logs, of the Vacuklav 41B+ User Manual).
Possible Cause
Autoclave internal memory for the error logs is almost full.
Action
Error logs are required by the technicians for maintenance and fault analysis. Read the internal error log memory to a storage medium of your choice with the Log Output menu.
Possible Cause
In the menu Settings / Logging, immediate output is activated, and the CF card is activated as the output medium, but was previously not plugged in.
Action
Press YES if you now would like to output the still not outputted logs to the CF card.
Possible Cause
In the menu Settings / Logging, immediate output is activated, and the log printer is activated as the output medium, but was previously not connected.
Action
Press YES if you now would like to print the logs still not printed out.
Possible Cause
With direct waste water connection: kinked effluent hose.
Action
Check the effluent hose for kinks or pinching.
Possible Cause
Autoclave is overloaded.
Action
Observe the maximum loads.
Possible Cause
The temperature surrounding the autoclave is too hot; the autoclave is obstructed and is getting no or too little cooling air.
Action
Make sure there is sufficient air flow at the rear of the autoclave.
Possible Cause
The autoclave was operated without an insert frame. This resulted in the packages of textiles coming into direct contact with the chamber and absorbing a large amount of condensate; this condensate vaporises upon evacuation and forms a large amount of steam; cooling air ingress holes on the base plate are covered e.g. by paper.
Action
Use insert frame; check for packaging residue in the chamber.
Possible Cause
Action
Possible Cause
Maximum permissible difference between the theoretical temperature and that measured by temperature sensor 2 (AIN02=Display) is too large.
Action
If the problem persists, call our service team on 0800 028 4749.
Possible Cause
Maximum admissible sterilisation temperature has been exceeded at temperature sensor 2 (AIN02=Display).
Action
If the problem persists, call our service team on 0800 028 4749.
Possible Cause
Minimum admissible sterilisation temperature not reached at temperature sensor 2 (AIN02=Display).
Action
If the problem persists, call our service team on 0800 028 4749.
Possible cause
Apart from a proper device function, the drying process depends on the correct setting up and loading of the autoclave.
Action
Once a day.
Once a day.
Once per week on a cold, empty chamber.
Yes, no residual water must be left in the unit overnight.
Hollow, solid and air retentive instruments can be put through on this cycle.
Yes, this requires the purchase of a double chamber syphon and can be fitted by a Henry Schein Dental engineer.
This is down to the practice requirements, but typically many practices will download once per week.
Consult the manufacturer of your autoclave as they will inform you if this is required. HTM 01-05 states that this should still be completed. If you obtain no advice from the manufacturer then follow the HTM 01-05 guidance.
For retention of value and functional reliability
Regular maintenance is very important for the retention of value and the reliable operation of the autoclave. During maintenance, all functional and safety-relevant components and electrical facilities are checked and replaced if necessary. The maintenance is carried out according to the maintenance instructions which are relevant for this autoclave.
Maintenance intervals
Have the maintenance regularly carried out at intervals of 2 years or after 2000 programme cycles. At this point in time, the autoclave issues a maintenance reminder message.
Examine the chamber including the door seal, chamber sealing surface and the mounting for loading (see image below) once a week for contaminants, deposits or damage.
.jpg)
If you find any contaminations, draw the existing trays or cassettes and the associated mounting forwards out of the chamber. Clean the contaminated parts.
When cleaning the chamber, the loading mounting, the chamber sealing surface and the door seal observe the following:
In case of non-observance the cleaned surface could become scratched or damaged and the sealing surfaces not tight. This would lead to dirt deposits and corrosion in the sterilisation chamber.
Housing parts
Clean the housing parts with neutral liquid cleaners or methylated alcohol.
Internal storage tank for feed water
If you use an internal water storage tank for feed water, check it for contaminants every time it is topped up.
Clean the water storage tank before refilling it with fresh feed water.
Clean the left side of the water storage tank (waste water) every two weeks.
Emptying the internal storage tank
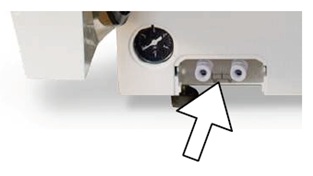
Empty the chambers of the internal storage tank as follows:
Please observe the following when removing the quick-fitting connection:
Formation of spots due to improperly cleaned instruments
Only if you correctly clean the instruments before sterilisation can you avoid the detachment of residues resulting from loading or instrument preparation under steam pressure during the sterilisation. Detached dirt residues (e.g. residues of disinfectants) can clog the filter, nozzles and valves of the autoclave and deposit as stains, spots or discolourations on the instruments and in the chamber (see page 19, Prepare items to be sterilised, in the Vacuklav 41B+ User Manual).
Formation of spots due to third-party rust
All steam-conducting parts of the autoclave are made of non-rusting materials. This excludes the formation of rust caused by the autoclave. Should rust stains occur you are dealing with third-party rust. If the instruments have been incorrectly prepared, rust can form even on stainless steel instruments. Often a single rust-producing instrument suffices for third-party rust to form on the other instruments or in the autoclave. Remove third-party rust from the instruments with a chlorine-free stainless steel cleaning agent or send the damaged instruments to the manufacturer for reconditioning.
Formation of spots due to inadequate quality of the feed water
The extent of the formation of spots on the instruments also depends on the quality of the feed water used for steam production.
Use qualitatively high-grade feed water
Observe the following when using feed water for steam sterilisation:
In case of non-observance, stains or damage on the instruments can arise and the function of the autoclave can be adversely affected.
Water according to VDE 0510
Distilled or demineralised water must have the VDE 0510 noted on the label of the packaging.
Feed water which you can inexpensively produce with the osmosis processes with MELAdem®40 or with the ions exchanger MELAdem®47 or by distillation with MELAdest®65, satisfies the requirements on the feed water.
Oil the door spindle at 2 month intervals as follows:
You will find the instructions for oiling the door spindle on the inner surface of the autoclave door.
We know an unexpected breakdown in your practice can be a massive headache for you and your patients - which is why we have a dedicated team of 50 people ready to provide you with a range of comprehensive cover options for your practice equipment, giving you complete peace of mind and minimising the cost of an unexpected breakdown. You can depend on us.
With Protection Cover, you get free access to our team of 10 high tech digital support specialists who can help with digital imaging, lasers and CAD/CAM. For the simpler problems, we also have technicians, who are dedicated to helping you over the phone. You can also at a small cost, use their services even if you don't have cover.
Invest in your practice - choose our comprehensive protection cover. For 12 months we will cover the items you want. It includes an annual service, emergency breakdown, labour and access to our high tech digital support specialists.
To get optimum performance from your equipment and to conform to manufacturer’s recommendations, an annual service could be just what you’re looking for. It’s carried out by our accredited team and includes a 3 month warranty on the work.
We are never far away in an emergency. Unplanned breakdowns are a headache for any surgery. We are more than happy to help.
Our equipment team will use the information you provide to respond to your query as promptly as possible.
You could ask about a FREE one-to-one consultation with one of our specialist team, quotation, demonstration of the latest equipment, or any other question you may have in helping you make an informed decision.